Showing posts with label activities. Show all posts

Monday, 7 August 2017

{Printable} The life cycle of a green bean plant


The theme in USB’s class this term is animals and plants so he has been interested in knowing more about life cycles and animal anatomy. I’m not sure if they’ve started on plants yet but I have been hearing a lot about different animals!

I set up this green bean life cycle set from Safari Ltd and made a printable showing the progression in seed growth. There are a few free printables available online to go with the life cycle set but I chose to make my own so I can use the font that USB is practising in his classroom. I have also made 3-part cards printables which I will set up for USB another day and the same printable can be made into a book.

To present the tray, I showed each model and verbally said its corresponding state on the life cycle and placed the model in the correct box. The great thing about this set is that each of the models has a label on the bottom so the child can self-correct by checking the labels against their work on the sheet.

Hopefully, some time during the week, we’ll plant some green bean seeds and see if we could get some seedlings. If you use the printables, please leave a comment and link back to this blog and tag @fix.grow.create on Instagram if you take a photo :)

Links to printables:


The plant life cycle 3-part cards
 
Thank you for stopping by!

If you use the printable, please leave a comment and link back to the blog :)

Please follow our instagram account: @fix.grow.create

Monday, 31 July 2017

{Printable} Paper cutting and Lego tray


 Paper cutting tray

Last night, Dr B took a pair of scissors and started cutting a strip of adhesive backing that he found. So I believe it’s time to bring out cutting strips. With USB I used to just print out blank squares and rectangles in the beginning. But I saw the colourful themed strips on Deb’s Living Montessori Now blog and thought I’d make one too. I just picked some royalty-free images of the cars Dr B likes and made the strips and printed them out.

I then prepared the cutting tray. I placed the strips on top, a pair of scissors on the left side (to reinforce writing movement from left to right if you use the Latin alphabet) and a small bowl to put the cuttings in. 

I presented the tray to Dr B, demonstrating to him how I picked up one strip of paper and handed it to my left hand, picked up the scissors, cut and placed the photos in the bowl. Dr B would sit and watch with his hands on his lap (it took many many times until he finally understood the need to sit still while observing 😅).

When he was done with his tray, I put the cuttings alongside art supplies to be used in collages and other artwork. 

Here is the link to the car cutting strip printable: Cars

Lego tray


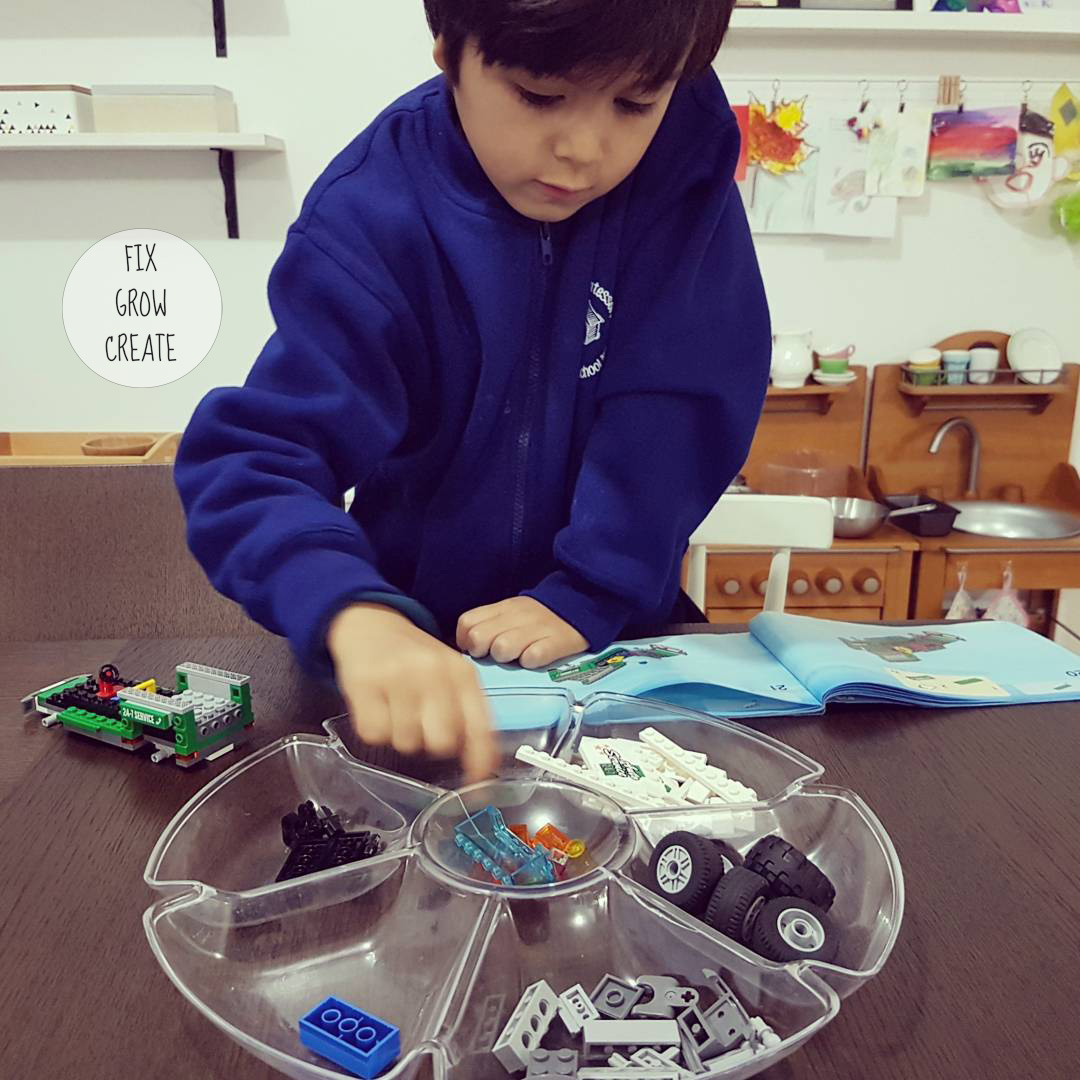
USB is currently obsessed with Lego so I decided to make a Lego tray for him. This way, when he is done building something, he can put it on his shelf and then I can rotate with other sets.

I prepared the tray by putting the instructions and a container of the corresponding Lego pieces on the left-hand side and the sorting tray on the right-hand side. 

He sorted the pieces by colour and proceeded with building following the instruction booklet.

Thank you for stopping by!

If you use the printable, please leave a comment and link back to the blog :)

Please follow our instagram account: @fix.grow.create


Monday, 15 February 2016

{Printable} Sink and float activity

 
Aiming for a quick activity, I just gathered a few (waterproof) things around the house and put them in a small TROFAST container.

We had another tray for putting the items on and two sheets of laminated paper for sorting the items.

USB filled the container with water and tested each item on their floatability (or sinkability; whichever way you prefer).

I had a rubber duckie, empty and full minty tins, a key and a cup among others.

You may take it a step further by comparing empty and filled things; for example would a an empty cup sink or float? What about a filled one? At first, you might just want to introduce the concepts of sinking and floating. Then you can talk about the science behind it.

This activity is also perfect in the bath or outside.

These are the printables to go with the sink and float activity:

Float
Sink

Monday, 11 January 2016

{Printable} Number Bingo


This classic game is perfect for brushing up your child's number recognition skills.
 
What I did:

I printed out the bingo sheet and numbers and laminated them (optional), cut the numbers and place them in a bag (or box). I then used a permanent marker to randomly write down the numbers in the squares on the sheets.

How to play:


  1. Each player gets a sheet and a washable stamping marker (or any washable marker will do).
  2. A number is taken out of the bag and each player marks the corresponding number on their sheet. 
  3. The first player to get 5 numbers marked in a row yells out BINGO! and wins.
To play again, simply wipe off the marker on the sheet. If you want to change the numbers on the sheet, use rubbing alcohol to take off the numbers written with the permanent marker.

The great thing about this game is that you can use any numbers you want depending on your child's level. I will include more printables later on for other numbers.

The printables for the Bingo sheets and numbers from 1-25:

Bingo Sheet
Bingo numbers (1-25)

Have fun and thank you for stopping by!

Monday, 21 September 2015

{Printable} Basic shapes

Cutting and shapes
This activity helps with gripping, wrist movement and shape identification. Have your child cut out the shapes following the straight lines and curves. Then you may want to talk about the different basic shapes.

Here is the printable of basic shapes for the cutting activity:

Basic shapes

Thank you for stopping by!

Monday, 20 April 2015

{Art and craft} Edible paint

A repost from my old blog horrendezvous.blogspot.com 

Babies and toddlers put everything in their mouths so this quick and easy recipe is great for when you need an activity to occupy the little ones outdoors or even in the bathtub!


Ingredients

1 tbsp sugar
1/2 cup flour
2 cups water
Food colouring
5-6 glass jars (I reused baby food jars)

  1. In a small saucepan, mix sugar and flour. 
  2. Gradually whisk in water. 
  3. Turn heat on low and keep whisking until mixture becomes thick and, gooey. This should take about 5-10 minutes, no need to boil.
  4. Divide into jars.
  5. Add a few drops of food colouring in each and mix. I used the handle of a spoon. 
  6. Leave to completely cool and let the little tike have fun! 
We set up our 'art centre' in the back patio with old towels on the ground in anticipation of the mess but the bathtub would have been great too as you could just wash the bub off right away and extend the 'art' session!

Enjoy! Ta ra~