Showing posts with label montessori. Show all posts

Monday, 7 August 2017

{Printable} The life cycle of a green bean plant


The theme in USB’s class this term is animals and plants so he has been interested in knowing more about life cycles and animal anatomy. I’m not sure if they’ve started on plants yet but I have been hearing a lot about different animals!

I set up this green bean life cycle set from Safari Ltd and made a printable showing the progression in seed growth. There are a few free printables available online to go with the life cycle set but I chose to make my own so I can use the font that USB is practising in his classroom. I have also made 3-part cards printables which I will set up for USB another day and the same printable can be made into a book.

To present the tray, I showed each model and verbally said its corresponding state on the life cycle and placed the model in the correct box. The great thing about this set is that each of the models has a label on the bottom so the child can self-correct by checking the labels against their work on the sheet.

Hopefully, some time during the week, we’ll plant some green bean seeds and see if we could get some seedlings. If you use the printables, please leave a comment and link back to this blog and tag @fix.grow.create on Instagram if you take a photo :)

Links to printables:


The plant life cycle 3-part cards
 
Thank you for stopping by!

If you use the printable, please leave a comment and link back to the blog :)

Please follow our instagram account: @fix.grow.create

Monday, 31 July 2017

{Printable} Paper cutting and Lego tray


 Paper cutting tray

Last night, Dr B took a pair of scissors and started cutting a strip of adhesive backing that he found. So I believe it’s time to bring out cutting strips. With USB I used to just print out blank squares and rectangles in the beginning. But I saw the colourful themed strips on Deb’s Living Montessori Now blog and thought I’d make one too. I just picked some royalty-free images of the cars Dr B likes and made the strips and printed them out.

I then prepared the cutting tray. I placed the strips on top, a pair of scissors on the left side (to reinforce writing movement from left to right if you use the Latin alphabet) and a small bowl to put the cuttings in. 

I presented the tray to Dr B, demonstrating to him how I picked up one strip of paper and handed it to my left hand, picked up the scissors, cut and placed the photos in the bowl. Dr B would sit and watch with his hands on his lap (it took many many times until he finally understood the need to sit still while observing 😅).

When he was done with his tray, I put the cuttings alongside art supplies to be used in collages and other artwork. 

Here is the link to the car cutting strip printable: Cars

Lego tray


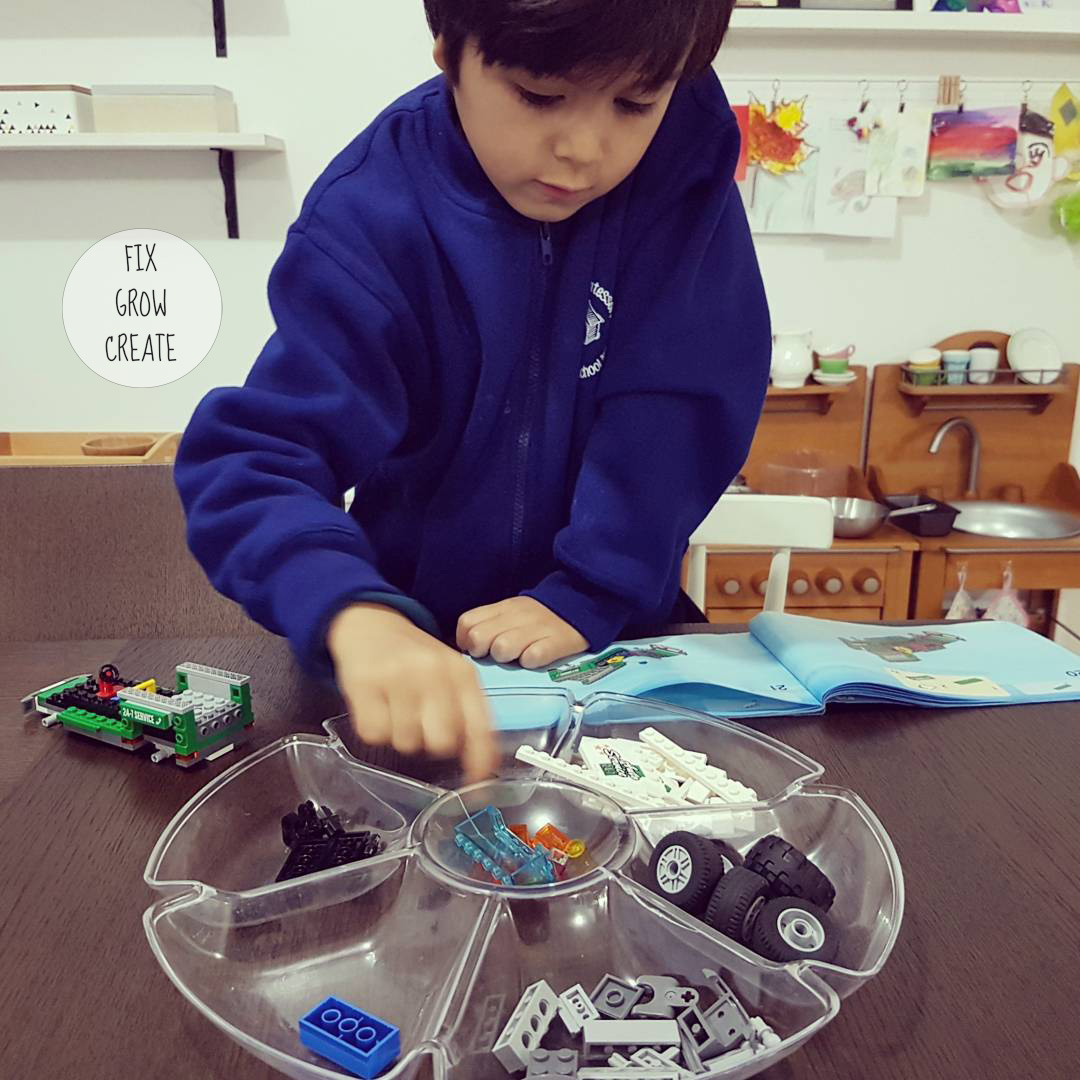
USB is currently obsessed with Lego so I decided to make a Lego tray for him. This way, when he is done building something, he can put it on his shelf and then I can rotate with other sets.

I prepared the tray by putting the instructions and a container of the corresponding Lego pieces on the left-hand side and the sorting tray on the right-hand side. 

He sorted the pieces by colour and proceeded with building following the instruction booklet.

Thank you for stopping by!

If you use the printable, please leave a comment and link back to the blog :)

Please follow our instagram account: @fix.grow.create


Monday, 15 February 2016

{Printable} Sink and float activity

 
Aiming for a quick activity, I just gathered a few (waterproof) things around the house and put them in a small TROFAST container.

We had another tray for putting the items on and two sheets of laminated paper for sorting the items.

USB filled the container with water and tested each item on their floatability (or sinkability; whichever way you prefer).

I had a rubber duckie, empty and full minty tins, a key and a cup among others.

You may take it a step further by comparing empty and filled things; for example would a an empty cup sink or float? What about a filled one? At first, you might just want to introduce the concepts of sinking and floating. Then you can talk about the science behind it.

This activity is also perfect in the bath or outside.

These are the printables to go with the sink and float activity:

Float
Sink

Tuesday, 22 September 2015

{Recipe} Copycat Ritz crackers

I always have a packet of Ritz crackers handy for when Umar or visiting kiddies get hungry, I can just whip out a few and cut slices of cheese into cutesy shapes and they just devour them.

But then I thought of the amount of salt and ingredients with numbers in those crackers and I wondered if someone's already replicated the recipe with much more natural (unaltered) ingredients. And Stef from the Cupcake Project did! So I copied her recipe, cut out some more salt and I was happy with the outcome. 
The crackers are all different adorable shapes that scream homemade and they are delicious! I hope you'll have a try and let me know how they turn out! 

Copycat Ritz crackers (makes about 100 pieces depending on your cutter size)

Ingredients
2-2¼ cups bread flour (you can use all purpose flour)
3 tsp baking powder
½ tsp salt
1½ tbsp raw sugar
2 tbsp oil (I used grapeseed but you can use extra virgin olive oil)
80 g unsalted butter (cold)
2/3 cup cold water
1 tbsp unsalted butter (melted) 
  1. Preheat oven to 200°C (180°C fan-forced).
  2. Pulse all the dry ingredients in a food processor. Add oil and pulse.
  3. Add butter bit by bit and pulse until thoroughly mixed through. 
  4. Add water little by little until dough comes together. If you used too much water, add a little more flour until dough comes away from the bowl. 
  5. Roll out thinly (about 3mm) on a floured surface and cut with a scalloped cookie cutter (or whatever small shape you like).
  6. Place on lined baking trays and pierce the surface of the cracker surface with holes (I used a candy thermometer like Stef but any substitute is fine). Brush lightly with the melted butter.
  7. Bake for about 10-12 minutes and cool on wire racks. Enjoy!
Notes:
  • If you don't have a food processor, you can quickly rub the butter into the flour with your fingers.
  • Cold butter gives 'layers' to these crackers.
  • Next time I might refrigerate the dough for 20 minutes before rolling and 10 more minutes before baking to keep the shapes more consistent.
Please leave comments on other yummy snacks for the kiddies! Thank you for stopping by!

Monday, 21 September 2015

{Printable} Basic shapes

Cutting and shapes
This activity helps with gripping, wrist movement and shape identification. Have your child cut out the shapes following the straight lines and curves. Then you may want to talk about the different basic shapes.

Here is the printable of basic shapes for the cutting activity:

Basic shapes

Thank you for stopping by!

Saturday, 12 September 2015

{Recipe} Sweet banana loaf

So what are you going to do with those two overripe bananas that you wouldn't let your toddler eat yesterday because you didn't want him to spoil his appetite? You can of course just mash and freeze them. Even better, bake banana stuff!

We made banana loaf. It's not as dense as banana bread but not as light as banana cake either. Its texture is somewhere in the middle of the two. This is a sweet loaf so we didn't embellish it with anything else. And the best thing about this recipe is that there's only 6 ingredients! 

Sweet banana loaf (makes one loaf)

Ingredients
 
150 g unsalted butter
150 g raw sugar
2 eggs (lightly beaten)
150 g self-raising cake flour (see notes)
1 tsp baking powder
2 very ripe bananas


  1. Preheat oven to 180°C (160°C fan-forced). Line a loaf tin. 
  2. In a small bowl, mix flour and baking powder. 
  3. Mash bananas and set aside.
  4. In the mixer, cream butter and sugar until light and fluffy. 
  5. Add eggs and mix until incorporated.
  6. Add flour mixture and beat on low until just mixed. 
  7. Fold in bananas with a spatula. 
  8. Place in loaf tin and bake for 25 minutes. The centre of loaf will be 'jiggly'. Turn down the oven to 120°C (100°C fan-forced) and bake for another 10 minutes. 
  9. Skewer should come out clean. Otherwise, leave for another 5-10 minutes to bake. 
  10. Cool completely and slice.
Notes:
  • Cake flour makes bakes very soft and fluffy (soft flour). If you don't have any self-raising cake flour, you can just use plain self-raising flour but the loaf will turn out a little denser.
  • I am a sucker for warm bakes so I sliced it while warm. It was a little crumbly because it was so soft but so worth it!
  • The loaf is awesome on the day and becomes a little denser on the next but don't worry it will still be awesome. It should keep for a few days in an airtight container at room temperature.
Thank you for stopping by!

Thursday, 3 September 2015

{Recipe} Plain bagels

We don't have a kosher bakery near us (not that I know of anyway) and the bagels we get from Coles are $5.40 for 4, that can get quite steep to have every other morning. 

I've been meaning to try out the bagel recipe in this book, One more slice by Leila Lindholm, for a while now. I've tried out her pizza, brownies and a few other recipes and I liked them. I think I got the book from Book Depository when they had one of their hourly flash sales.

It's a recipe with simple ingredients but from my experience, requires a bit of technical expertise. I followed it pretty much to the T but next time I'll know what to do differently. Have a look at my notes at the bottom. 
These bagels are absolutely delicious toasted. They are best eaten on the day and I recommend slicing and freezing what you have left for later. 

Bagels (makes about 12)


Ingredients
800g bread flour
2 tsp dry instant yeast
1 tbsp salt
2 tbsp honey
500ml lukewarm water
Polenta (optional)
1 egg white
  1. Mix all dry ingredients in a mixing bowl. Mix in honey. Add water little by little until incorporated. 
  2. Using the dough hook on your mixer, knead for 10-15 minutes (see notes). If kneading by hand, I'm guessing you'd have to knead for a long time. 
  3. Cover bowl with a tea towel and leave to rise for about 50 minutes until doubled in size. 
  4. Knead dough by hand for a few minutes and divide them into 12 portions (we had 13 because I gave a piece to Umar; he used cookie cutters, cutlery and whatever else he could use with it). Liberally flour (or use polenta) a baking tray or two.
  5. Shape them into balls and press in the middle with your thumb and stretch out the round shape. Place the circles on the floured trays and cover with a tea towel and let rise again for another 40 minutes. 
  6. Preheat oven to 180°C (170°C fan-forced). Place 2 pizza stones to heat up as well. In the meantime, put a huge pot of water to a roiling boil.
  7. Drop in 2 bagels at a time for about 30 seconds (make sure they're submerged in water the entire time).  
  8. Dry on them on paper towels.
  9. Take out the pizza stones and sprinkle some polenta on them. Arrange bagels on top, brush with beaten egg white and bake for 25-30 minutes until golden or to your liking. If you don't have pizza stones, you can line a baking tray or two with baking paper and arrange the bagels on them. This will probably result in a soggy bottom but they'll still be delicious.
  10. Cool, slice and enjoy with your favourite toppings!
Notes:
  • It's still cold here so I let my dough rise in the oven at 30°C.
  • Umar's dough, which he kneaded like crazy, turned out the best bagel in the batch. So I will recommend kneading on the longer side. I suppose the more you work the gluten, the chewier (the better) the bagels.
  • Next time, I will try replacing some of the bread flour with gluten flour to make it even stronger.
  • Next time I will make larger holes because they really do puff up after the second rise. The holeless bagels bothered me so much that I used a tiny cookie cutter to make new holes after boiling them haha.
  • I used baking paper for the second rise and the dough stuck to it, making them lose their shape when I peeled them off to boil.
I will update the recipe if I do anything else differently.
Thank you for stopping by!

Friday, 28 August 2015

{Recipe} Soft oat and coconut slices

I absolutely love Carman's Oat slice and I could have them every day! But they're pretty pricey in the long run so I thought I'd find a recipe that would make something similar. I came across this one from Budget Bytes. I changed a few things as I tend to do. I used honey in place of brown sugar, milk instead of soy milk and omitted the walnuts. 

These things!
These turned out soft and delicious but sadly not the texture I wanted to copy the Carman's slice. Taste-wise it's pretty much there though. So I will have to find a recipe that is more cookie-like in nature. 

The slices are on the less sweet side so if you want them sweeter, consider adding sugar (not more honey as that might add too much liquid to the recipe) or even make a quick icing to drizzle on top. 

The baby was napping so we mixed everything by hand. If you use a mixer to cream the butter, the slice will turn out puffier and lighter. 

Ingredients (6-9 slices)
¼ cup unsalted butter, softened and at room temperature
¼ cup honey
1 egg
1 cup milk
1 tsp vanilla essence
1½ cups traditional oats
1 cup wholemeal flour
1 tsp cinnamon
1 tsp baking powder
½ to 1 cup shredded coconut
  1. Preheat oven to 180°C (170°C fan-forced).
  2. Line your baking tray (I used a 9x9" glass dish).
  3. Mix all the dry ingredients together. 
  4. Cream butter. Mix in honey.
  5. Add egg and mix until fluffy. 
  6. Add milk and vanilla essence and mix thoroughly.
  7. Add dry ingredients and mix gently until just mixed. 
  8. Place in baking tray and bake for 20-30 minutes. The time depends on the type of dish you use, oven, etc. When it's done, it should look golden and start browning around the edges and you'd smell the 'doneness' if you know what I mean lol.
  9. Cool and slice as you wish. I used a bread knife to get clean slices. 
Notes:
  • When baking, make sure your ingredients are at room temperature unless stated otherwise
  • I use unsalted butter when making sweet bakes
 Thank you for stopping by!